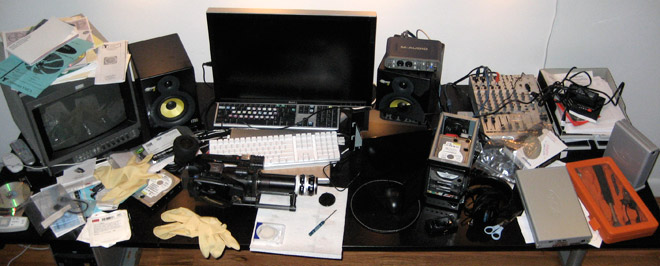
You may want to refrain from reading this post unless you have a vested interest in learning about the number of technical hurdles one can run into while no-budget filmmaking. Here are updates on several fronts:
Data Recovery:
Our last update ended with our dead hard drive—containing the entirety of episode one—in the hands of a data recovery service. Our own attempts at restoring the drive proved fruitless, as software-driven data recovery on a Mac RAID 0 drive is not what it could be (Disk Warrior and Data Rescue II don’t fully support RAID 0 files at this time). Unfortunately, the data recovery guy at Tekserve also couldn’t recover anything. Furthermore, he told us that DriveSavers might be able to recover some of our data, but not all of it, and it would likely cost $2k or more. Considering that figure is more than twice the budget of episode one, we were thus faced with batch recapturing the footage from the DV tapes and reconstituting Episode One ourselves. To do this, we used…
Adobe Premiere Pro CS3:
Premiere Pro CS3 on the Mac should really be renamed Premiere Pro Beta. After Premiere Pro 3.0.1 stopped recognizing our DV camera, I decided to revert to 3.0 in case the update somehow severed the connection (it turns out the culprit was in fact updating to Mac OS 10.4.10… I think). However, the CS3 installer is buggy, and it wouldn’t reinstall Premiere Pro alone, thus requiring a fresh install of the entire CS3 suite. Also, you have to run a terminal script (CS3Clean) if you want to completely uninstall CS3; the Adobe Uninstaller, despite its name, does not in fact uninstall everything Adobe. Even after this, however, the CS3 suite still wouldn’t install on our Mac. After several aborted installs we found that Mac OS 10.4.10 won’t accept an install of the suite at all. Adobe, you might want to look into that. Thus we reverted to Mac OS 10.4.9 (requiring an operating system reinstall) in order to (re)install CS3. In the end, it wasn’t necessary—the same capture bug reared its head. Turns out the workaround is to turn your DV camera on and off until Premiere magically recognizes it (you may have to close CS3, turn the camera off, restart CS3, and not turn the camera on until the capture window is up). Still, even after we batch-captured episode one’s footage all over again, we still had problems getting the shots into…
Adobe After Effects CS3:
The much-touted Dynamic Link and cut-and-paste functionality between Premiere and After Effects is the reason we’re editing in Adobe’s NLE instead of Final Cut Pro. To date, it’s been a terrific (and cost-effective) way to offline/online the show. However, be cautioned if you batch recapture your footage in Premiere, because After Effects does not recognize the “subclip” file scheme that Premiere generates. This may or may not be because episode one was originally captured and edited in the Premiere Pro CS3 beta, but I suspect it’s more likely that Adobe’s individual clip capture generates different filenames than a whole-tape “Scene Detect” capture. Thus we had to paste the Premiere timeline into After Effects and copy-paste our shot-by-shot color correction onto the 70+ shots that constitute episode one. However, many keyframes were off by a frame or two, the 24p cadences had to be re-interpreted on an individual basis, and any clip that had an L-cut applied (when an audio edit leads or trails the video edit) was off in duration. However, episode one is now triumphantly reconstituted, and backed up on three separate external drives in two different apartments. We’re not losing it again, thanks to our new…
RAID:
RAID level 5 offers the best balance between speed, cost, and safety when you’re dealing with 4+ hard drives. Simultaneously, eSATA is the latest, greatest interface. But an eSATA RAID 5 setup is basically impossible on the current Mac OS unless you have a PCIe/x controller, which is an impossibility on a MacBook Pro (yes, The West Side is produced entirely on a laptop). An eSATA expresscard for laptops that supports RAID does exist, but… it doesn’t have Mac drivers. Thus RAID 10 was our next choice; however, it’s not easy to set up a hardware RAID 10 on a laptop, either (using the Mac’s software RAID would be easier, but we don’t like that idea as much, for portability and stability reasons). Also, if you want a RAID 10 solution that offers an interface in addition to eSATA (USB2, for example), good luck finding an existing solution out there. After much legwork, we did eventually set up a 1TB (four 500GB drives, mirrored and striped) hardware eSATA/USB2 RAID 10 array setup for only $700, but how we did it justifies a whole blog